AirRAM MK2 (AR20) support
Identify your part
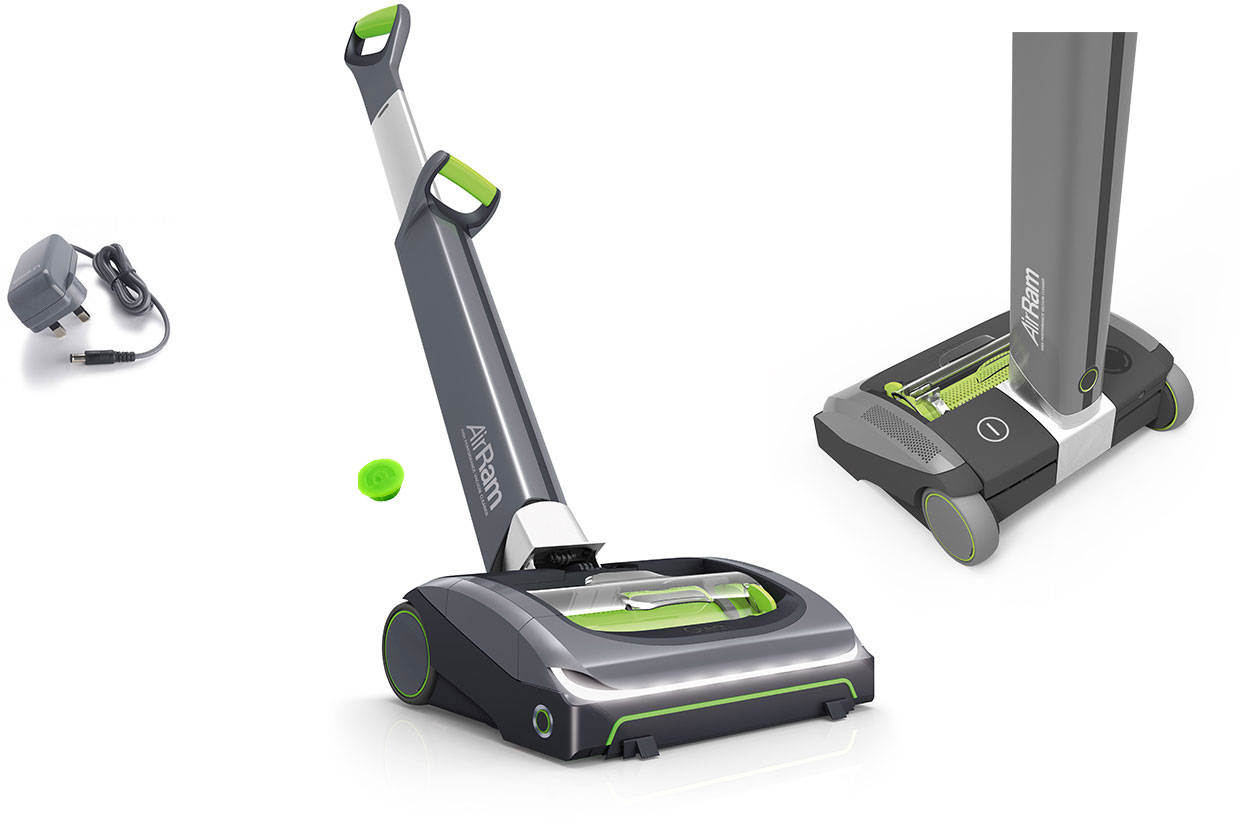
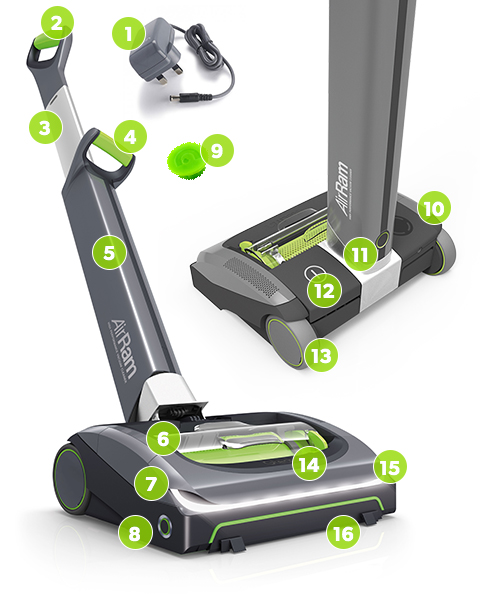
- 0 Lower handle
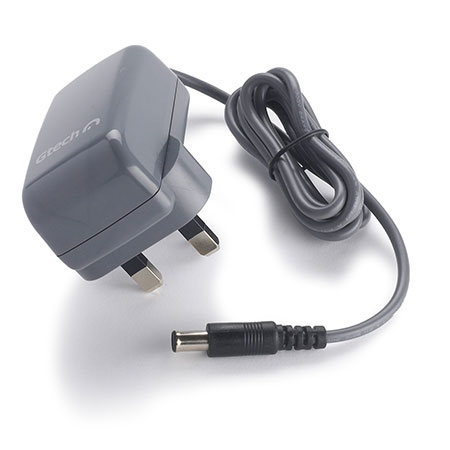
- 1 Charger
- 2 Ergonomic handle
- 3 Upper handle
- 4 Carry handle
- 5 Lower handle
- 6 Bin, filter & shroud
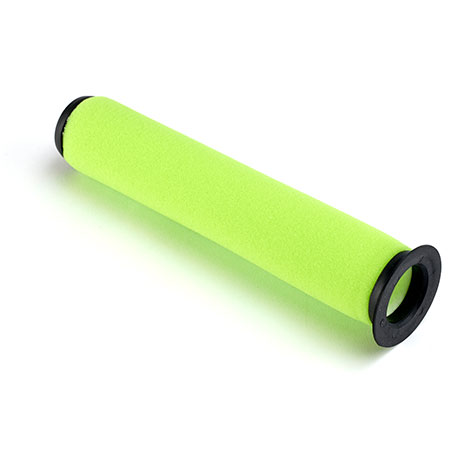
- 7 Head assembly
- 8 Brush-bar & spindle
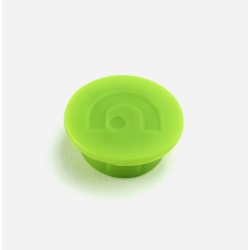
- 9 Bung
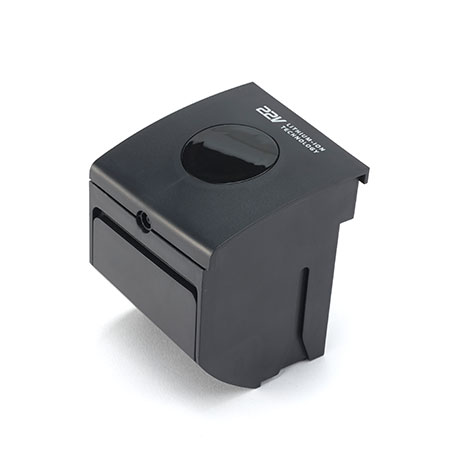
- 10 Removable battery with state-of-charge indicator
- 11 Handle release button
- 12 On / Off pedal
- 13 Rear wheels
- 14 Bin ejector arm
- 15 LED headlights
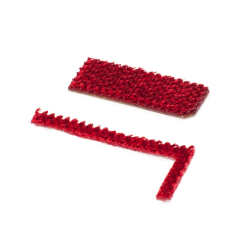
- 16 Riser visor (front seal)
Troubleshooting
Check that the battery is charged
We know it sounds silly, but it’s always worth double checking that your vacuum is actually charged!
If the charge indicator has 1 flashing green light, charge the battery for the full 4 hours. Plug the charger into the charging port on the back of the battery before plugging it into the mains. The battery can be charged on or off the machine. We’d recommend removing the battery if you want to charge it for the full 4 hours.
As the battery charges, the LEDs will light up green in turn. Once fully charged, 4 green solid lights will show on the battery’s display.
Make sure the charger is unplugged
Your AirRam MK2 won’t work if the charger is still plugged into the mains. Unplug the charger from the mains and the vacuum and try using the vacuum again.
Check that the battery is fitted correctly
Unplug your AirRam MK2 from the mains and remove the battery. The sliding channels should be clear so that you can slide the battery back down in the battery-housing. When fitted correctly, the battery will click and secure into place.
The battery terminals may be dirty or damaged
Unplug your AirRam MK2 from the mains and remove the battery.
If the battery terminals or head assembly terminals are dirty, it may be preventing your AirRam MK2 from functioning properly. Make sure you keep the battery and head assembly clean in order to maintain your AirRam MK2’s cleaning performance.
Remove the battery and use a dry, soft cloth to wipe it clean and check for any damage. The battery terminals are located on the back of the battery, just above the ratings label. Wipe the head assembly terminals, too – these are located in the battery-housing and look like metal pins.
The On/ Off button is faulty
The AirRam MK2 is operated by an On/ Off pedal. You’ll be able to hear a clicking noise and the pedal will bounce easily between an up and down position while the battery is detached. If this doesn’t happen, check that you’ve removed the plastic protector from your vacuum. If you’ve removed the plastic protector and there’s still no clicking noise or pedal-bounce, the head assembly may need replacing. Get in touch with us as we may need to send you a replacement part.
Is the brush-bar jammed?
Unplug your AirRam MK2 from the mains and remove the battery.
If the charge indicator on the battery is showing 4 solid red lights, the brush-bar may have jammed and your vacuum will automatically cut out.
Lay the vacuum on its back and press the release button on the left-hand side to unlock the brush-bar. Pull it away from the same side as the release button first. Use scissors to get rid of any hair/ thread that has caught around the brush-bar. Remove any hair that’s caught around the brush-bar spindle, too – this is located in the brush-bar-housing on the right-hand side. Also check for any damage to the ends of the brush bar.
Refit the brush-bar, lining it up with the spindle-side first. Position the red covering on the opposite side in an ‘L’ shape. Then push the brush-bar back into its housing until it clicks into place. Spin the bar to check it’s balanced and moves easily. Wait 10 seconds before reinserting the battery and trying to use the vacuum again.
Check that the brush-bar is fitted correctly
Unplug your AirRam MK2 from the mains and remove the battery.
Lay the vacuum on its back and press the release button on the side of the head assembly to unlock the brush-bar. Pull it away from the same side as the release button first.
Refit the brush-bar, lining it up with the spindle-side first. Position the red covering on the opposite side in an ‘L’ shape. Push the brush-bar back into its housing until it clicks into place. Spin the bar to check it’s balanced and moves easily. Wait 10 seconds before reinserting the battery and trying to use the vacuum again.
Check that the filter is clean
If there is an unexpected smell coming from your AirRam MK2, the filter may need cleaning.
Remove the dirt bin, using its handles to lift it from the head assembly. It should lift out easily, you can wiggle it if it feels a little bit stiff. Pull the filter out of its housing in the dirt bin, remove the shroud and tap the dirt from the filter into your s bin.
Twist the filter to remove it from its shroud and wash it under a tap. Squeeze out any excess water and leave it to completely dry - this normally takes around 24 hours. Remove any blockages from the filter and dirt bin.
To refit, slide the shroud back into the filter once they’ve both dried – this normally takes around 24 hours. Put this back into the vacuum’s bin and line it up over the housing on the AirRam MK2. Slide the ejector arm back to its original position – there is a small slot on the bin that the green tab fits into. Push it down into the housing and the bin will click when it’s correctly fitted, lying flush inside the head assembly.
Is the brush-bar jammed?
Unplug your AirRam MK2 from the mains and remove the battery.
If the charge indicator on the battery is showing 4 solid red lights, the brush-bar may have jammed creating a smell and your vacuum will automatically cut out.
Lay the vacuum on its back and press the release button on the left-hand side to unlock the brush-bar. Pull it away from the same side as the release button first. Use scissors to get rid of any hair/ thread that has caught around the brush-bar. Remove any hair that’s caught around the brush-bar spindle, too – this is located in the brush-bar-housing on the right-hand side. Also check for any damage to the ends of the brush bar.
Refit the brush-bar, lining it up with the spindle-side first. Position the red covering on the opposite side in an ‘L’ shape. Then push the brush-bar back into its housing until it clicks into place. Spin the bar to check it’s balanced and moves easily. Wait 10 seconds before reinserting the battery and trying to use the vacuum again
Check that the battery is charged
We know it sounds silly, but it’s always worth double checking that your vacuum is actually charged!
If the charge indicator has 1 flashing green light, charge the battery for the full 4 hours. Plug the charger into the charging port on the back of the battery before plugging it into the mains. The battery can be charged on or off the machine. We’d recommend removing the battery if you want to charge it for the full 4 hours.
As the battery charges, the LEDs will light up green in turn. Once fully charged, 4 green solid lights will show on the battery’s display.
The battery terminals may be dirty or damaged
Unplug your AirRam MK2 from the mains and remove the battery.
If the battery terminals or head assembly terminals are dirty, it may be preventing your AirRam MK2 from functioning properly. Make sure you keep the battery and head assembly clean in order to maintain your AirRam MK2’s cleaning performance.
Remove the battery and use a dry, soft cloth to wipe it clean and check for any damage. The battery terminals are located on the back of the battery, just above the ratings label. Wipe the head assembly terminals, too – these are located in the battery-housing and look like metal pins.
If the battery is showing 4 solid red lights, the brush-bar may have jammed
Unplug your AirRam MK2 from the mains and remove the battery.
If the charge indicator on the battery is showing 4 solid red lights, the brush-bar may have jammed and your vacuum will automatically cut out.
Lay the vacuum on its back and press the release button on the left-hand side to unlock the brush-bar. Pull it away from the same side as the release button first. Use scissors to get rid of any hair/ thread that has caught around the brush-bar. Remove any hair that’s caught around the brush-bar spindle, too – this is located in the brush-bar-housing on the right-hand side. Also check for any damage to the ends of the brush bar.
Refit the brush-bar, lining it up with the spindle-side first. Position the red covering on the opposite side in an ‘L’ shape. Then push the brush-bar back into its housing until it clicks into place. Spin the bar to check it’s balanced and moves easily. Wait 10 seconds before reinserting the battery and trying to use the vacuum again.
If there is a decrease in power, the bin may need emptying
Unplug your AirRam MK2 from the mains and remove the battery.
If the bin is full, the suction levels will drop and there will be a decrease in power as a result. Remove the dirt bin, using its handles to lift it from the head assembly. It should lift out easily, you can wiggle it if it feels a little bit stiff. Hold it over a bin and unclip the lid-release clip. Slide the ejector arm to release any dirt and debris.
To refit, position it up over the housing on the AirRam MK2. Slide the ejector arm back to its original position – there is a small slot on the bin that the green tab fits into. Line it up and push it down into the housing. The bin will click when it’s correctly fitted, lying flush inside the head assembly.
If there is a decrease in power, the filter may be blocked
Unplug your AirRam MK2 from the mains and remove the battery.
The AirRam MK2’s filters are made to last, but you need to look after them to keep them performing efficiently. We recommend cleaning the filter at least once a month – this will improve the vacuum’s performance and will increase the lifespan of the filter. You can buy spare filters online via our spares page.
Remove the dirt bin, using its handles to lift it from the head assembly. It should lift out easily, you can wiggle it if it feels a little bit stiff. Pull the filter out of its housing in the dirt bin, remove the shroud and tap the dirt from the filter into your bin.
Twist the filter to remove it from its shroud and wash it under a tap. Squeeze out any excess water and leave it to completely dry - this normally takes around 24 hours. Remove any blockages from the filter and dirt bin.
To refit, slide the shroud back into the filter once they’ve both dried – this normally takes around 24 hours. Put this back into the vacuum’s bin and line it up over the housing on the AirRam MK2. Slide the ejector arm back to its original position – there is a small slot on the bin that the green tab fits into. Push it down into the housing and the bin will click when it’s correctly fitted, lying flush inside the head assembly.
Check the battery lights
The battery needs to be charged.
There is an issue with the charger. Remove the charger and check for damage to the charger and charging hole on the battery. If there are no signs of damage, refit the charger and try again.
If the battery is still not charging , get in touch with us as we may need to send you a replacement part.
Unplug the battery and charger. Refit the battery into the head assembly and try again.
If this doesn’t solve this issue, remove the battery and brush-bar and leave the vacuum for 10 minutes before replacing and retrying.
Remove the battery and check if the brush-bar has jammed.
These solutions normally work, but, if you’re still having problems, follow our charger troubleshooting guide below.
Check the charger
If you’ve worked your way through the above steps to reset your battery and your AirRam MK2’s still not working, it may be an issue with your charger. There are a few ways you can check if there’s an issue with the charger.
When the charger is plugged into the battery, there should be at least 1 light showing green. If there are no lights illuminated, continue to the next step.
If the charger fitting is loose, there will be excessive movement when it’s plugged into the battery, so get in touch with us as we may need to send you a replacement part.
Check to see if the charger gets warm when it’s charging the battery. Check for signs of damage to the charger cable. If it’s ripped or frayed, or the pin is broken on the charger, you need a replacement charger to ensure your AirRam MK2 works safely. You can buy a replacement charger online via our spares page.
Check for signs of damage to the charging port in the battery. If you can’t see anything wrong with your charger but it’s still not working, try plugging it into another socket as it may be an issue with the mains.
If you have a spare charger, try using that one instead - the AirRam MK2 charger is compatible with the chargers for the other AirRam products, Multi/ K9, Pro/ K9, Power Floor/ K9, ST20, HT20 and Work Light.
If you’ve taken all the steps to check your battery and charger and your vacuum still isn’t charging, get in touch with us as we may need to send you a replacement part.
The bin needs emptying or refitting
Unplug your AirRam MK2 from the mains and remove the battery before carrying out any maintenance work.
If the bin is full, the suction levels will drop as a result. Remove the dirt bin, using its handles to lift it from the head assembly. It should lift out easily, you can wiggle it if it feels a little bit stiff. Hold it over a bin and unclip the lid-release clip. Slide the ejector arm to release any dirt and debris.
To refit, line it up over the housing on the AirRam MK2. Slide the ejector arm back to its original position – there is a small slot on the bin that the green tab fits into. Push it down into the housing and the bin will click when it’s correctly fitted, lying flush inside the head assembly.
The filter could be blocked
Unplug your AirRam MK2 from the mains and remove the battery.
The AirRam MK2’s filters are made to last, but you need to look after them to keep them performing efficiently. We recommend cleaning the filter at least once a month – this will improve the vacuum’s performance and will increase the lifespan of the filter. You can buy spare filters online via our spares page.
Remove the dirt bin, using its handles to lift it from the head assembly. It should lift out easily, you can wiggle it if it feels a little bit stiff. Pull the filter out of its housing in the dirt bin, remove the shroud and tap the dirt from the filter into your bin.
Twist the filter to remove it from its shroud and wash it under a tap. Squeeze out any excess water and leave it to completely dry - this normally takes around 24 hours. Remove any blockages from the filter and dirt bin.
To refit, slide the shroud back into the filter once they’ve both dried – this normally takes around 24 hours. Put this back into the vacuum’s bin and line it up over the housing on the AirRam MK2. Slide the ejector arm back to its original position – there is a small slot on the bin that the green tab fits into. Push it down into the housing and the bin will click when it’s correctly fitted, lying flush inside the head assembly.
The battery is running low
There will be a small reduction in suction when the battery is running low. Recharge your battery to reinstate the usual level of suction. You can fully charge the AirRam MK2 in 4 hours, or charge it for a shorter period for a burst of cleaning time.
Check that the battery is fitted correctly
Unplug your AirRam MK2 from the mains and remove the battery.
The sliding channels in the head assembly should be clear so that you can slide the battery back down in the battery-housing. When fitted correctly, the battery will click and secure into place.
The machine could be blocked
Unplug your AirRam MK2 from the mains and remove the battery.
There may be a blockage in the base of the AirRam MK2. When the dirt bin is removed, check for any blockages inside the bin-housing in the head assembly. Check the brush-bar and its housing for any blockages, too. Remove any hair/ thread from around the brush-bar and get rid of any dirt or debris inside its housing.
Lay the vacuum on its back and press the release button on the left-hand side to unlock the brush-bar. Pull it away from the same side as the release button first. Use scissors to get rid of any hair/ thread that has caught around the brush-bar. Remove any hair that’s caught around the brush-bar spindle, too – this is located in the brush-bar-housing on the right-hand side.
Refit the brush-bar, lining it up with the spindle-side first. Position the red covering on the opposite side in an ‘L’ shape. Then push the brush-bar back into its housing until it clicks into place. Spin the bar to check it’s balanced and moves easily. Wait 10 seconds before reinserting the battery and trying to use the vacuum again.
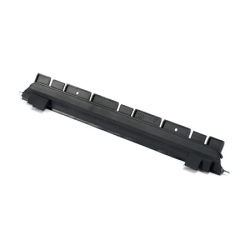
Check the seal for signs of damage
Unplug your AirRam MK2 from the mains and remove the battery.
‘Riser visor’ (RV) refers to the front seal on the AirRam MK2. If the riser visor is incorrectly fitted or damaged, pick-up performance will be reduced. The RV is located at the front of the head assembly, just in front of the brush-bar. Lay the machine on its back to expose the brush-bar and firmly pull the RV out from the head assembly. You’ll see a metal spoke on each end of the RV. Pull it from one end so that one spoke detaches from its housing. The RV should now lift out easily.
If the RV is showing signs of damage beyond usual wear and tear, get in touch with us as we may need to send you a replacement part.
If you’ve already received your replacement RV, take these steps to fit the new one in place.
Lay the machine on its back to expose the brush-bar and firmly pull the old RV out from the head assembly. You’ll see a metal spoke on each end of the RV. Pull it from one end so that one spoke detaches from its housing. The RV should now lift out easily.
Line up the tabs of the replacement RV along the front of the head assembly behind the green line. The black tabs will slot into place in the housing. Clip both ends of the metal spoke under the corners of the vacuum and push it in to secure it in place.
Suction port test
Remove the dirt bin and turn on the AirRam MK2. Place a piece of paper – not your hand! – over the motor suction port, located on the inside of the head assembly in the bin-housing. If there is no sign of suction, remove the battery and check around the suction port for signs of damage to the seal. Get in touch with us as we may need to send you a replacement part.
An issue with the bin can cause a whistling noise
Unplug your AirRam MK2 from the mains and remove the battery.
Remove the dirt bin, using its handles to lift it from the head assembly. It should lift out easily, you can wiggle it if it feels a little bit stiff. To refit, line it up over the housing on the AirRam MK2. Slide the ejector arm back to its original position – there is a small slot on the bin that the green tab fits into. Push it down into the housing and the bin will click when it’s correctly fitted, lying flush inside the head assembly.
An issue with the seals can cause a whistling noise
Unplug your AirRam MK2 from the mains and remove the battery.
Damage to the seals can cause a high-pitched whistling noise. Remove the dirt bin and check the seal around the suction port, located on the inside of the head assembly in the bin-housing. Also check the bin lid seals are not damaged. Check that the filter rubber seals are not damaged. Replace the battery and turn the vacuum on without the bin in the vacuum and see if the noise stops.
An issue with the motor can cause a high-pitched noise
Unplug your AirRam MK2 from the mains and remove the battery.
Remove the bin and replace the battery. Switch the vacuum on and see if the noise disappears. If so, check the bin seals around the lid are not damaged.
If the noise continues, remove the battery again and remove the brush-bar. Replace the battery and switch the vacuum on to see if the noise disappears.
If so, check the brush-bar for signs of damage and ensure it has been correctly fitted. If the noise continues, get in touch with us as we may need to send you a replacement part.
If the brush-bar is damaged or incorrectly fitted, there may be a vibrating or grinding noise
Unplug your AirRam MK2 from the mains and remove the battery.
Lay the vacuum on its back and press the release button on the left-hand side to unlock the brush-bar. Pull it away from the same side as the release button first. Use scissors to get rid of any hair/ thread that has caught around the brush-bar. Remove any hair that’s caught around the brush-bar spindle, too – this is located in the brush-bar-housing on the right-hand side. Also check for any damage to the ends of the brush bar.
Refit the brush-bar, lining it up with the spindle-side first. Position the red covering on the opposite side in an ‘L’ shape. Then push the brush-bar back into its housing until it clicks into place. Spin the bar to check it’s balanced and moves easily. Wait 10 seconds before reinserting the battery and trying to use the vacuum again.
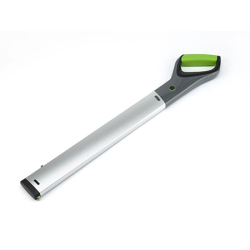
Trouble fitting the upper handle
Check that the button on the upper handle is not damaged – it should press in and easily spring back out.
Visually check the sliding channels inside the lower handle - they should be clear with no signs of damage. If the upper handle appears to be catching in the centre of the lower handle, you can order a replacement handle online via our spares page.
Trouble removing the upper handle
Fully extend the upper handle by pressing the button on the side of the top handle. At the same time, pull the upper handle upward.
Using the tip of a pen or similar small implement, push in the green clip located in the small square hole at the top of the lower handle. At the same time, push in the button on the side of the upper handle and pull the upper handle out from the lower handle.
With the upper handle removed, check the buttons (located at the bottom of the upper handle) for signs of damage - you can order a replacement handle online via our spares page.
Trouble fitting the lower handle
Check the button at the bottom on the back of the lower handle pushes in and out. Next check the hole at the bottom of the lower handle and the black plastic pin on the head assembly is not damaged.
Then place the lower handle over the black plastic pin and slide it down into the head assembly. The handle will click into place when it’s correctly fitted, lying flush against the head assembly.
Trouble removing the lower handle
Press the button in, at the bottom on the back of the lower handle and pull the handle up at the same time away from the head assembly. If the button will not press in get in touch with us as we may need to send you a replacement part.
Trouble reclining the handle
Make sure the lower handle has been correctly inserted into the black plastic pin on the head assembly and the handle has clicked into place.
Put your foot on the left hand-side of the head assembly and pull the handle backwards away from the vacuum. You will hear the handle click as it is pulled backwards and forwards this is normal.
Troubleshooting
No Power
Check that the battery is charged
We know it sounds silly, but it’s always worth double checking that your vacuum is actually charged!
If the charge indicator has 1 flashing green light, charge the battery for the full 4 hours. Plug the charger into the charging port on the back of the battery before plugging it into the mains. The battery can be charged on or off the machine. We’d recommend removing the battery if you want to charge it for the full 4 hours.
As the battery charges, the LEDs will light up green in turn. Once fully charged, 4 green solid lights will show on the battery’s display.
Make sure the charger is unplugged
Your AirRam MK2 won’t work if the charger is still plugged into the mains. Unplug the charger from the mains and the vacuum and try using the vacuum again.
Check that the battery is fitted correctly
Unplug your AirRam MK2 from the mains and remove the battery. The sliding channels should be clear so that you can slide the battery back down in the battery-housing. When fitted correctly, the battery will click and secure into place.
The battery terminals may be dirty or damaged
Unplug your AirRam MK2 from the mains and remove the battery.
If the battery terminals or head assembly terminals are dirty, it may be preventing your AirRam MK2 from functioning properly. Make sure you keep the battery and head assembly clean in order to maintain your AirRam MK2’s cleaning performance.
Remove the battery and use a dry, soft cloth to wipe it clean and check for any damage. The battery terminals are located on the back of the battery, just above the ratings label. Wipe the head assembly terminals, too – these are located in the battery-housing and look like metal pins.
The On/ Off button is faulty
The AirRam MK2 is operated by an On/ Off pedal. You’ll be able to hear a clicking noise and the pedal will bounce easily between an up and down position while the battery is detached. If this doesn’t happen, check that you’ve removed the plastic protector from your vacuum. If you’ve removed the plastic protector and there’s still no clicking noise or pedal-bounce, the head assembly may need replacing. Get in touch with us as we may need to send you a replacement part.
Is the brush-bar jammed?
Unplug your AirRam MK2 from the mains and remove the battery.
If the charge indicator on the battery is showing 4 solid red lights, the brush-bar may have jammed and your vacuum will automatically cut out.
Lay the vacuum on its back and press the release button on the left-hand side to unlock the brush-bar. Pull it away from the same side as the release button first. Use scissors to get rid of any hair/ thread that has caught around the brush-bar. Remove any hair that’s caught around the brush-bar spindle, too – this is located in the brush-bar-housing on the right-hand side. Also check for any damage to the ends of the brush bar.
Refit the brush-bar, lining it up with the spindle-side first. Position the red covering on the opposite side in an ‘L’ shape. Then push the brush-bar back into its housing until it clicks into place. Spin the bar to check it’s balanced and moves easily. Wait 10 seconds before reinserting the battery and trying to use the vacuum again.
Check that the brush-bar is fitted correctly
Unplug your AirRam MK2 from the mains and remove the battery.
Lay the vacuum on its back and press the release button on the side of the head assembly to unlock the brush-bar. Pull it away from the same side as the release button first.
Refit the brush-bar, lining it up with the spindle-side first. Position the red covering on the opposite side in an ‘L’ shape. Push the brush-bar back into its housing until it clicks into place. Spin the bar to check it’s balanced and moves easily. Wait 10 seconds before reinserting the battery and trying to use the vacuum again.
Unpleasant Smell
Check that the filter is clean
If there is an unexpected smell coming from your AirRam MK2, the filter may need cleaning.
Remove the dirt bin, using its handles to lift it from the head assembly. It should lift out easily, you can wiggle it if it feels a little bit stiff. Pull the filter out of its housing in the dirt bin, remove the shroud and tap the dirt from the filter into your s bin.
Twist the filter to remove it from its shroud and wash it under a tap. Squeeze out any excess water and leave it to completely dry - this normally takes around 24 hours. Remove any blockages from the filter and dirt bin.
To refit, slide the shroud back into the filter once they’ve both dried – this normally takes around 24 hours. Put this back into the vacuum’s bin and line it up over the housing on the AirRam MK2. Slide the ejector arm back to its original position – there is a small slot on the bin that the green tab fits into. Push it down into the housing and the bin will click when it’s correctly fitted, lying flush inside the head assembly.
Is the brush-bar jammed?
Unplug your AirRam MK2 from the mains and remove the battery.
If the charge indicator on the battery is showing 4 solid red lights, the brush-bar may have jammed creating a smell and your vacuum will automatically cut out.
Lay the vacuum on its back and press the release button on the left-hand side to unlock the brush-bar. Pull it away from the same side as the release button first. Use scissors to get rid of any hair/ thread that has caught around the brush-bar. Remove any hair that’s caught around the brush-bar spindle, too – this is located in the brush-bar-housing on the right-hand side. Also check for any damage to the ends of the brush bar.
Refit the brush-bar, lining it up with the spindle-side first. Position the red covering on the opposite side in an ‘L’ shape. Then push the brush-bar back into its housing until it clicks into place. Spin the bar to check it’s balanced and moves easily. Wait 10 seconds before reinserting the battery and trying to use the vacuum again
Battery & Charging
Check that the battery is charged
We know it sounds silly, but it’s always worth double checking that your vacuum is actually charged!
If the charge indicator has 1 flashing green light, charge the battery for the full 4 hours. Plug the charger into the charging port on the back of the battery before plugging it into the mains. The battery can be charged on or off the machine. We’d recommend removing the battery if you want to charge it for the full 4 hours.
As the battery charges, the LEDs will light up green in turn. Once fully charged, 4 green solid lights will show on the battery’s display.
The battery terminals may be dirty or damaged
Unplug your AirRam MK2 from the mains and remove the battery.
If the battery terminals or head assembly terminals are dirty, it may be preventing your AirRam MK2 from functioning properly. Make sure you keep the battery and head assembly clean in order to maintain your AirRam MK2’s cleaning performance.
Remove the battery and use a dry, soft cloth to wipe it clean and check for any damage. The battery terminals are located on the back of the battery, just above the ratings label. Wipe the head assembly terminals, too – these are located in the battery-housing and look like metal pins.
If the battery is showing 4 solid red lights, the brush-bar may have jammed
Unplug your AirRam MK2 from the mains and remove the battery.
If the charge indicator on the battery is showing 4 solid red lights, the brush-bar may have jammed and your vacuum will automatically cut out.
Lay the vacuum on its back and press the release button on the left-hand side to unlock the brush-bar. Pull it away from the same side as the release button first. Use scissors to get rid of any hair/ thread that has caught around the brush-bar. Remove any hair that’s caught around the brush-bar spindle, too – this is located in the brush-bar-housing on the right-hand side. Also check for any damage to the ends of the brush bar.
Refit the brush-bar, lining it up with the spindle-side first. Position the red covering on the opposite side in an ‘L’ shape. Then push the brush-bar back into its housing until it clicks into place. Spin the bar to check it’s balanced and moves easily. Wait 10 seconds before reinserting the battery and trying to use the vacuum again.
If there is a decrease in power, the bin may need emptying
Unplug your AirRam MK2 from the mains and remove the battery.
If the bin is full, the suction levels will drop and there will be a decrease in power as a result. Remove the dirt bin, using its handles to lift it from the head assembly. It should lift out easily, you can wiggle it if it feels a little bit stiff. Hold it over a bin and unclip the lid-release clip. Slide the ejector arm to release any dirt and debris.
To refit, position it up over the housing on the AirRam MK2. Slide the ejector arm back to its original position – there is a small slot on the bin that the green tab fits into. Line it up and push it down into the housing. The bin will click when it’s correctly fitted, lying flush inside the head assembly.
If there is a decrease in power, the filter may be blocked
Unplug your AirRam MK2 from the mains and remove the battery.
The AirRam MK2’s filters are made to last, but you need to look after them to keep them performing efficiently. We recommend cleaning the filter at least once a month – this will improve the vacuum’s performance and will increase the lifespan of the filter. You can buy spare filters online via our spares page.
Remove the dirt bin, using its handles to lift it from the head assembly. It should lift out easily, you can wiggle it if it feels a little bit stiff. Pull the filter out of its housing in the dirt bin, remove the shroud and tap the dirt from the filter into your bin.
Twist the filter to remove it from its shroud and wash it under a tap. Squeeze out any excess water and leave it to completely dry - this normally takes around 24 hours. Remove any blockages from the filter and dirt bin.
To refit, slide the shroud back into the filter once they’ve both dried – this normally takes around 24 hours. Put this back into the vacuum’s bin and line it up over the housing on the AirRam MK2. Slide the ejector arm back to its original position – there is a small slot on the bin that the green tab fits into. Push it down into the housing and the bin will click when it’s correctly fitted, lying flush inside the head assembly.
Check the battery lights
The battery needs to be charged.
There is an issue with the charger. Remove the charger and check for damage to the charger and charging hole on the battery. If there are no signs of damage, refit the charger and try again.
If the battery is still not charging , get in touch with us as we may need to send you a replacement part.
Unplug the battery and charger. Refit the battery into the head assembly and try again.
If this doesn’t solve this issue, remove the battery and brush-bar and leave the vacuum for 10 minutes before replacing and retrying.
Remove the battery and check if the brush-bar has jammed.
These solutions normally work, but, if you’re still having problems, follow our charger troubleshooting guide below.
Check the charger
If you’ve worked your way through the above steps to reset your battery and your AirRam MK2’s still not working, it may be an issue with your charger. There are a few ways you can check if there’s an issue with the charger.
When the charger is plugged into the battery, there should be at least 1 light showing green. If there are no lights illuminated, continue to the next step.
If the charger fitting is loose, there will be excessive movement when it’s plugged into the battery, so get in touch with us as we may need to send you a replacement part.
Check to see if the charger gets warm when it’s charging the battery. Check for signs of damage to the charger cable. If it’s ripped or frayed, or the pin is broken on the charger, you need a replacement charger to ensure your AirRam MK2 works safely. You can buy a replacement charger online via our spares page.
Check for signs of damage to the charging port in the battery. If you can’t see anything wrong with your charger but it’s still not working, try plugging it into another socket as it may be an issue with the mains.
If you have a spare charger, try using that one instead - the AirRam MK2 charger is compatible with the chargers for the other AirRam products, Multi/ K9, Pro/ K9, Power Floor/ K9, ST20, HT20 and Work Light.
If you’ve taken all the steps to check your battery and charger and your vacuum still isn’t charging, get in touch with us as we may need to send you a replacement part.
No suction
The bin needs emptying or refitting
Unplug your AirRam MK2 from the mains and remove the battery before carrying out any maintenance work.
If the bin is full, the suction levels will drop as a result. Remove the dirt bin, using its handles to lift it from the head assembly. It should lift out easily, you can wiggle it if it feels a little bit stiff. Hold it over a bin and unclip the lid-release clip. Slide the ejector arm to release any dirt and debris.
To refit, line it up over the housing on the AirRam MK2. Slide the ejector arm back to its original position – there is a small slot on the bin that the green tab fits into. Push it down into the housing and the bin will click when it’s correctly fitted, lying flush inside the head assembly.
The filter could be blocked
Unplug your AirRam MK2 from the mains and remove the battery.
The AirRam MK2’s filters are made to last, but you need to look after them to keep them performing efficiently. We recommend cleaning the filter at least once a month – this will improve the vacuum’s performance and will increase the lifespan of the filter. You can buy spare filters online via our spares page.
Remove the dirt bin, using its handles to lift it from the head assembly. It should lift out easily, you can wiggle it if it feels a little bit stiff. Pull the filter out of its housing in the dirt bin, remove the shroud and tap the dirt from the filter into your bin.
Twist the filter to remove it from its shroud and wash it under a tap. Squeeze out any excess water and leave it to completely dry - this normally takes around 24 hours. Remove any blockages from the filter and dirt bin.
To refit, slide the shroud back into the filter once they’ve both dried – this normally takes around 24 hours. Put this back into the vacuum’s bin and line it up over the housing on the AirRam MK2. Slide the ejector arm back to its original position – there is a small slot on the bin that the green tab fits into. Push it down into the housing and the bin will click when it’s correctly fitted, lying flush inside the head assembly.
The battery is running low
There will be a small reduction in suction when the battery is running low. Recharge your battery to reinstate the usual level of suction. You can fully charge the AirRam MK2 in 4 hours, or charge it for a shorter period for a burst of cleaning time.
Check that the battery is fitted correctly
Unplug your AirRam MK2 from the mains and remove the battery.
The sliding channels in the head assembly should be clear so that you can slide the battery back down in the battery-housing. When fitted correctly, the battery will click and secure into place.
The machine could be blocked
Unplug your AirRam MK2 from the mains and remove the battery.
There may be a blockage in the base of the AirRam MK2. When the dirt bin is removed, check for any blockages inside the bin-housing in the head assembly. Check the brush-bar and its housing for any blockages, too. Remove any hair/ thread from around the brush-bar and get rid of any dirt or debris inside its housing.
Lay the vacuum on its back and press the release button on the left-hand side to unlock the brush-bar. Pull it away from the same side as the release button first. Use scissors to get rid of any hair/ thread that has caught around the brush-bar. Remove any hair that’s caught around the brush-bar spindle, too – this is located in the brush-bar-housing on the right-hand side.
Refit the brush-bar, lining it up with the spindle-side first. Position the red covering on the opposite side in an ‘L’ shape. Then push the brush-bar back into its housing until it clicks into place. Spin the bar to check it’s balanced and moves easily. Wait 10 seconds before reinserting the battery and trying to use the vacuum again.
Check the seal for signs of damage
Unplug your AirRam MK2 from the mains and remove the battery.
‘Riser visor’ (RV) refers to the front seal on the AirRam MK2. If the riser visor is incorrectly fitted or damaged, pick-up performance will be reduced. The RV is located at the front of the head assembly, just in front of the brush-bar. Lay the machine on its back to expose the brush-bar and firmly pull the RV out from the head assembly. You’ll see a metal spoke on each end of the RV. Pull it from one end so that one spoke detaches from its housing. The RV should now lift out easily.
If the RV is showing signs of damage beyond usual wear and tear, get in touch with us as we may need to send you a replacement part.
If you’ve already received your replacement RV, take these steps to fit the new one in place.
Lay the machine on its back to expose the brush-bar and firmly pull the old RV out from the head assembly. You’ll see a metal spoke on each end of the RV. Pull it from one end so that one spoke detaches from its housing. The RV should now lift out easily.
Line up the tabs of the replacement RV along the front of the head assembly behind the green line. The black tabs will slot into place in the housing. Clip both ends of the metal spoke under the corners of the vacuum and push it in to secure it in place.
Suction port test
Remove the dirt bin and turn on the AirRam MK2. Place a piece of paper – not your hand! – over the motor suction port, located on the inside of the head assembly in the bin-housing. If there is no sign of suction, remove the battery and check around the suction port for signs of damage to the seal. Get in touch with us as we may need to send you a replacement part.
Excessive noise
An issue with the bin can cause a whistling noise
Unplug your AirRam MK2 from the mains and remove the battery.
Remove the dirt bin, using its handles to lift it from the head assembly. It should lift out easily, you can wiggle it if it feels a little bit stiff. To refit, line it up over the housing on the AirRam MK2. Slide the ejector arm back to its original position – there is a small slot on the bin that the green tab fits into. Push it down into the housing and the bin will click when it’s correctly fitted, lying flush inside the head assembly.
An issue with the seals can cause a whistling noise
Unplug your AirRam MK2 from the mains and remove the battery.
Damage to the seals can cause a high-pitched whistling noise. Remove the dirt bin and check the seal around the suction port, located on the inside of the head assembly in the bin-housing. Also check the bin lid seals are not damaged. Check that the filter rubber seals are not damaged. Replace the battery and turn the vacuum on without the bin in the vacuum and see if the noise stops.
An issue with the motor can cause a high-pitched noise
Unplug your AirRam MK2 from the mains and remove the battery.
Remove the bin and replace the battery. Switch the vacuum on and see if the noise disappears. If so, check the bin seals around the lid are not damaged.
If the noise continues, remove the battery again and remove the brush-bar. Replace the battery and switch the vacuum on to see if the noise disappears.
If so, check the brush-bar for signs of damage and ensure it has been correctly fitted. If the noise continues, get in touch with us as we may need to send you a replacement part.
If the brush-bar is damaged or incorrectly fitted, there may be a vibrating or grinding noise
Unplug your AirRam MK2 from the mains and remove the battery.
Lay the vacuum on its back and press the release button on the left-hand side to unlock the brush-bar. Pull it away from the same side as the release button first. Use scissors to get rid of any hair/ thread that has caught around the brush-bar. Remove any hair that’s caught around the brush-bar spindle, too – this is located in the brush-bar-housing on the right-hand side. Also check for any damage to the ends of the brush bar.
Refit the brush-bar, lining it up with the spindle-side first. Position the red covering on the opposite side in an ‘L’ shape. Then push the brush-bar back into its housing until it clicks into place. Spin the bar to check it’s balanced and moves easily. Wait 10 seconds before reinserting the battery and trying to use the vacuum again.
Handle
Trouble fitting the upper handle
Check that the button on the upper handle is not damaged – it should press in and easily spring back out.
Visually check the sliding channels inside the lower handle - they should be clear with no signs of damage. If the upper handle appears to be catching in the centre of the lower handle, you can order a replacement handle online via our spares page.
Trouble removing the upper handle
Fully extend the upper handle by pressing the button on the side of the top handle. At the same time, pull the upper handle upward.
Using the tip of a pen or similar small implement, push in the green clip located in the small square hole at the top of the lower handle. At the same time, push in the button on the side of the upper handle and pull the upper handle out from the lower handle.
With the upper handle removed, check the buttons (located at the bottom of the upper handle) for signs of damage - you can order a replacement handle online via our spares page.
Trouble fitting the lower handle
Check the button at the bottom on the back of the lower handle pushes in and out. Next check the hole at the bottom of the lower handle and the black plastic pin on the head assembly is not damaged.
Then place the lower handle over the black plastic pin and slide it down into the head assembly. The handle will click into place when it’s correctly fitted, lying flush against the head assembly.
Trouble removing the lower handle
Press the button in, at the bottom on the back of the lower handle and pull the handle up at the same time away from the head assembly. If the button will not press in get in touch with us as we may need to send you a replacement part.
Trouble reclining the handle
Make sure the lower handle has been correctly inserted into the black plastic pin on the head assembly and the handle has clicked into place.
Put your foot on the left hand-side of the head assembly and pull the handle backwards away from the vacuum. You will hear the handle click as it is pulled backwards and forwards this is normal.
Register your product
RegisterRegister to access your Gtech warranty, and for quicker and more efficient support tailored for you.
RegisterSpares
-
 AirRAM MK2 AirLOC Visor£9.99
 -
 AirRAM MK2 Upper Handle£14.99
 -
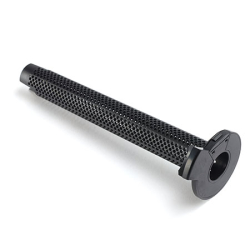
 AirRAM MK2 Front Roller£5.99
 -
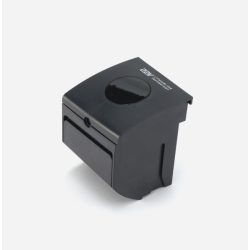
 AirRAM MK2 Head Assembly£69.99
 -
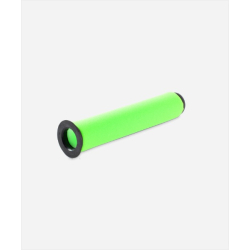
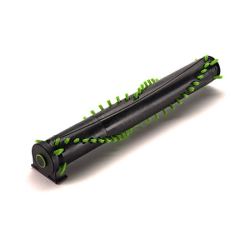 AirRAM MK2 Brush Bar£12.99
 -
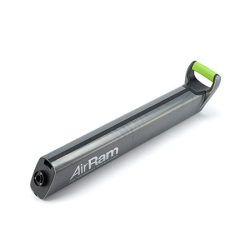 AirRAM MK2 Lower Handle£14.99
 -
 Floorcare Charger£19.99
Still need a hand?
We're ready when you are